
Valentine’s Day is coming up quick! Some quick ideas for kids class cards. All have been created with FunStampersJourney product. Some images are new and some are retired, but, all are fun👏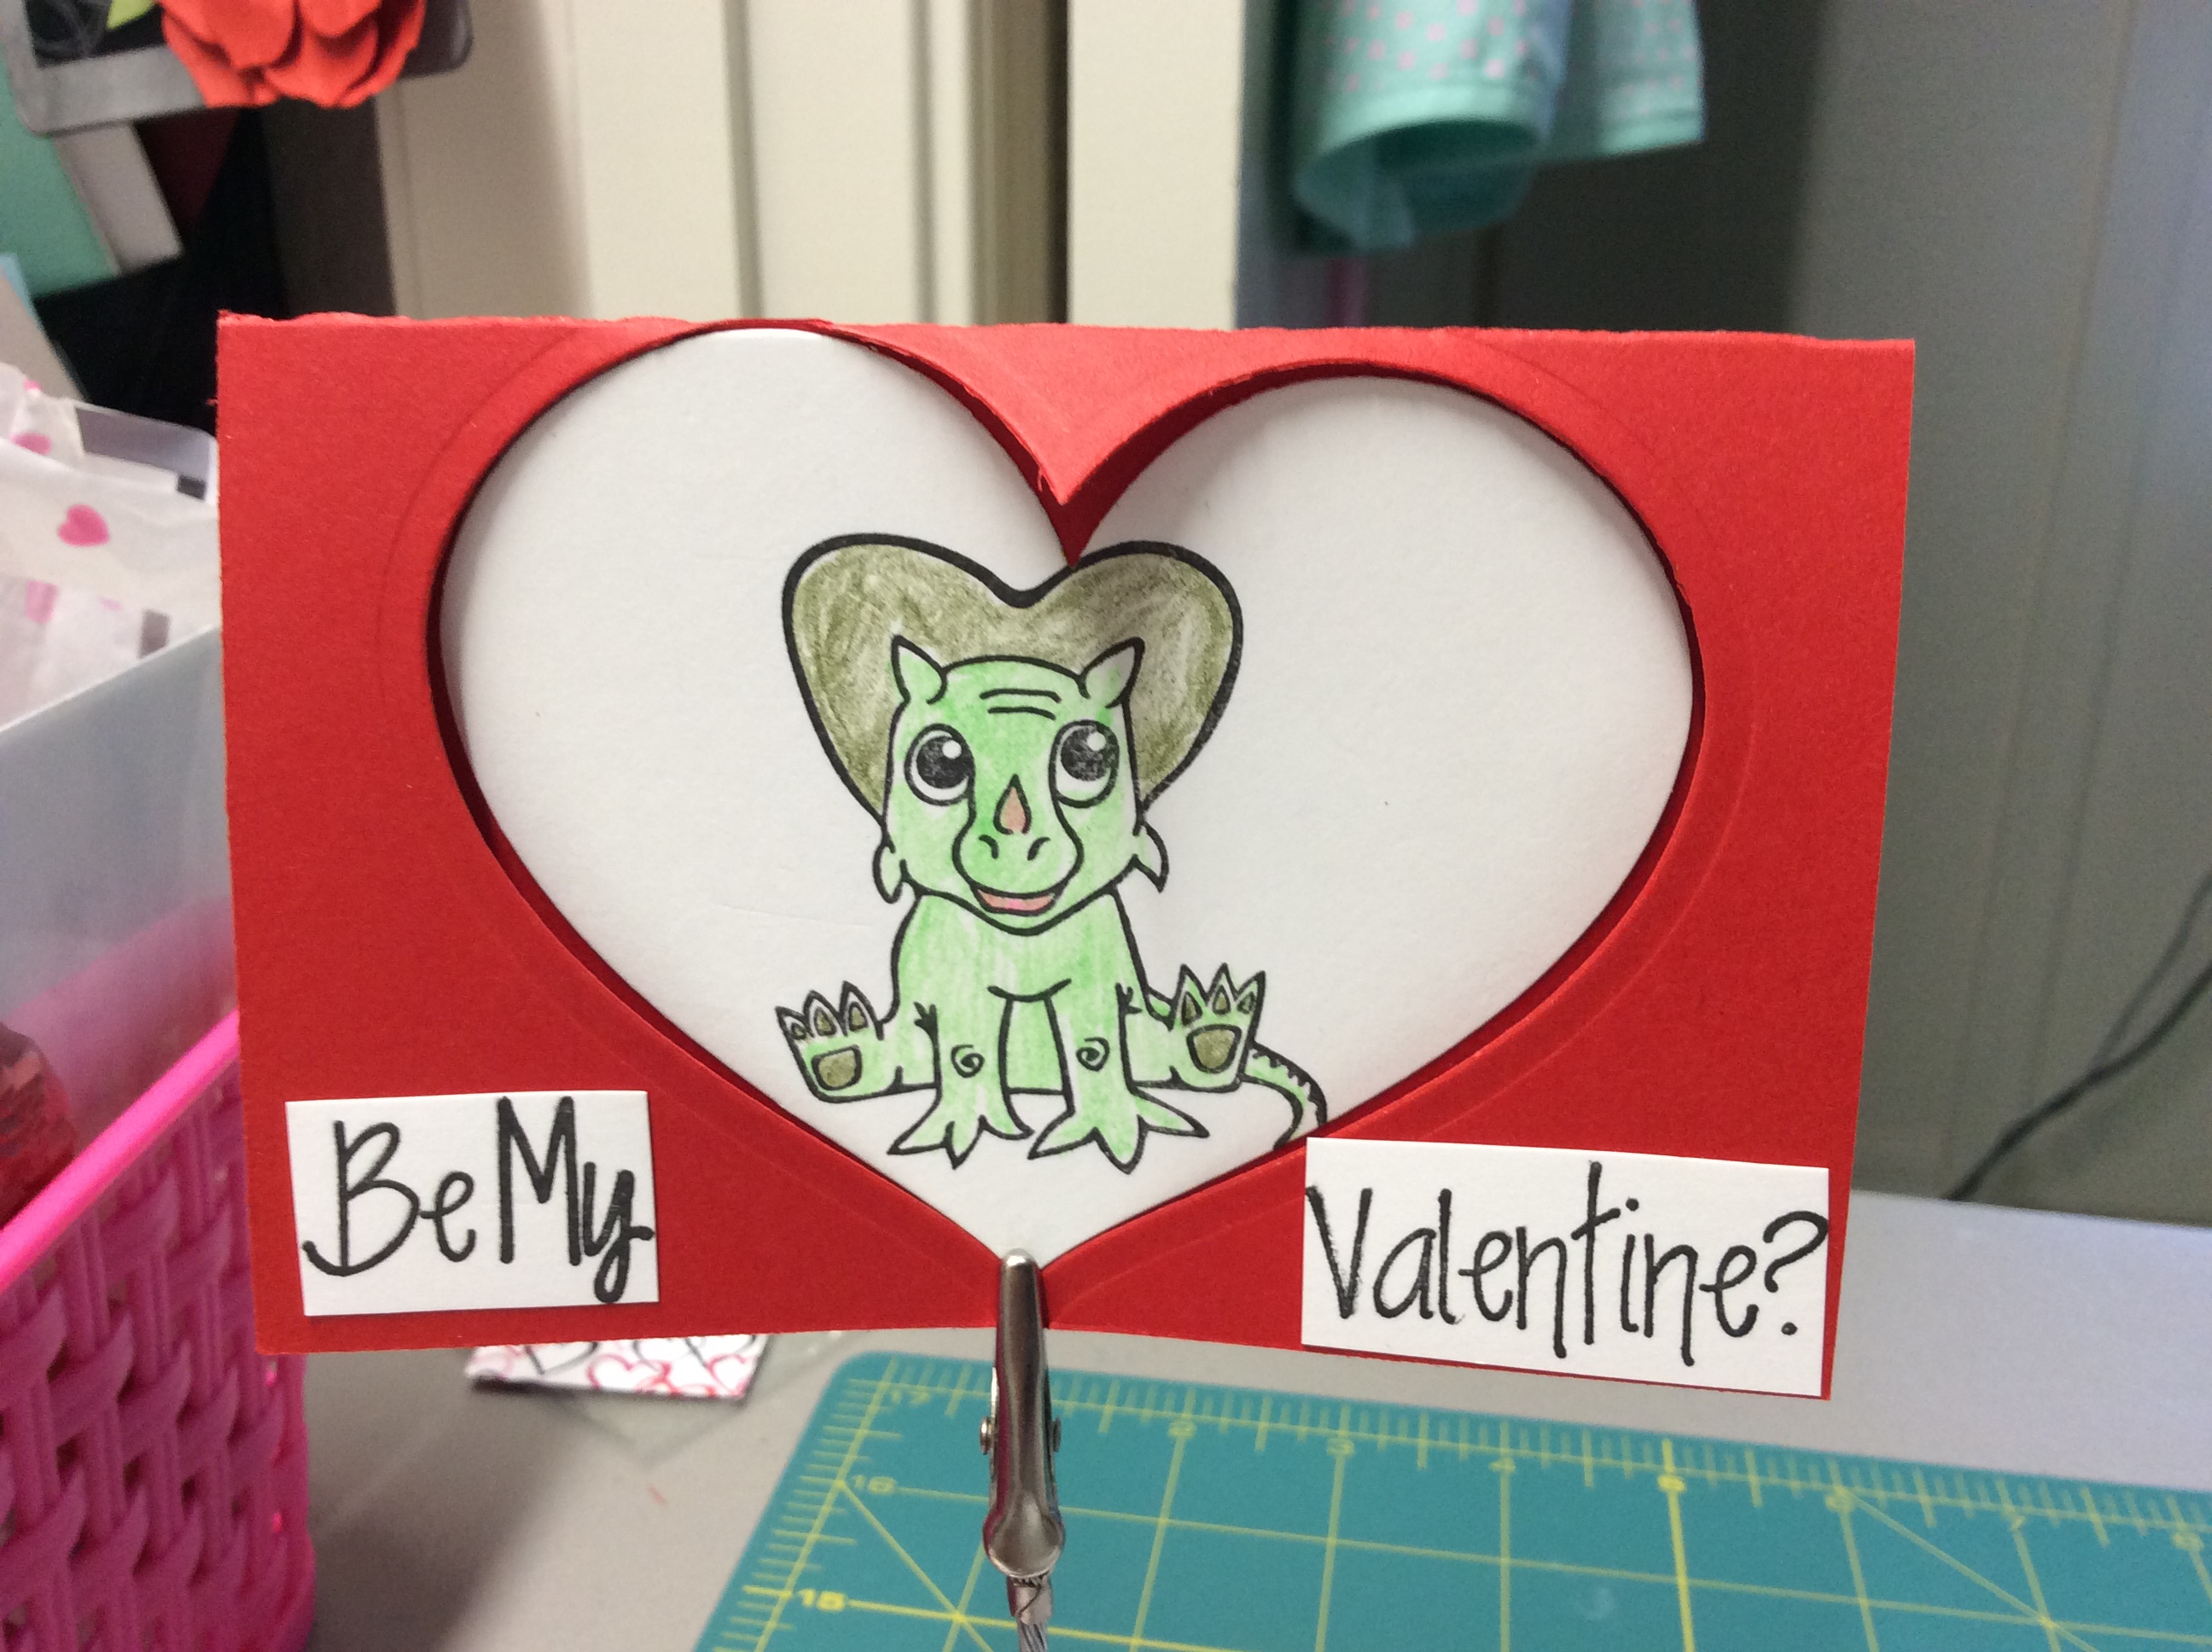


Valentine’s Day is coming up quick! Some quick ideas for kids class cards. All have been created with FunStampersJourney product. Some images are new and some are retired, but, all are fun👏
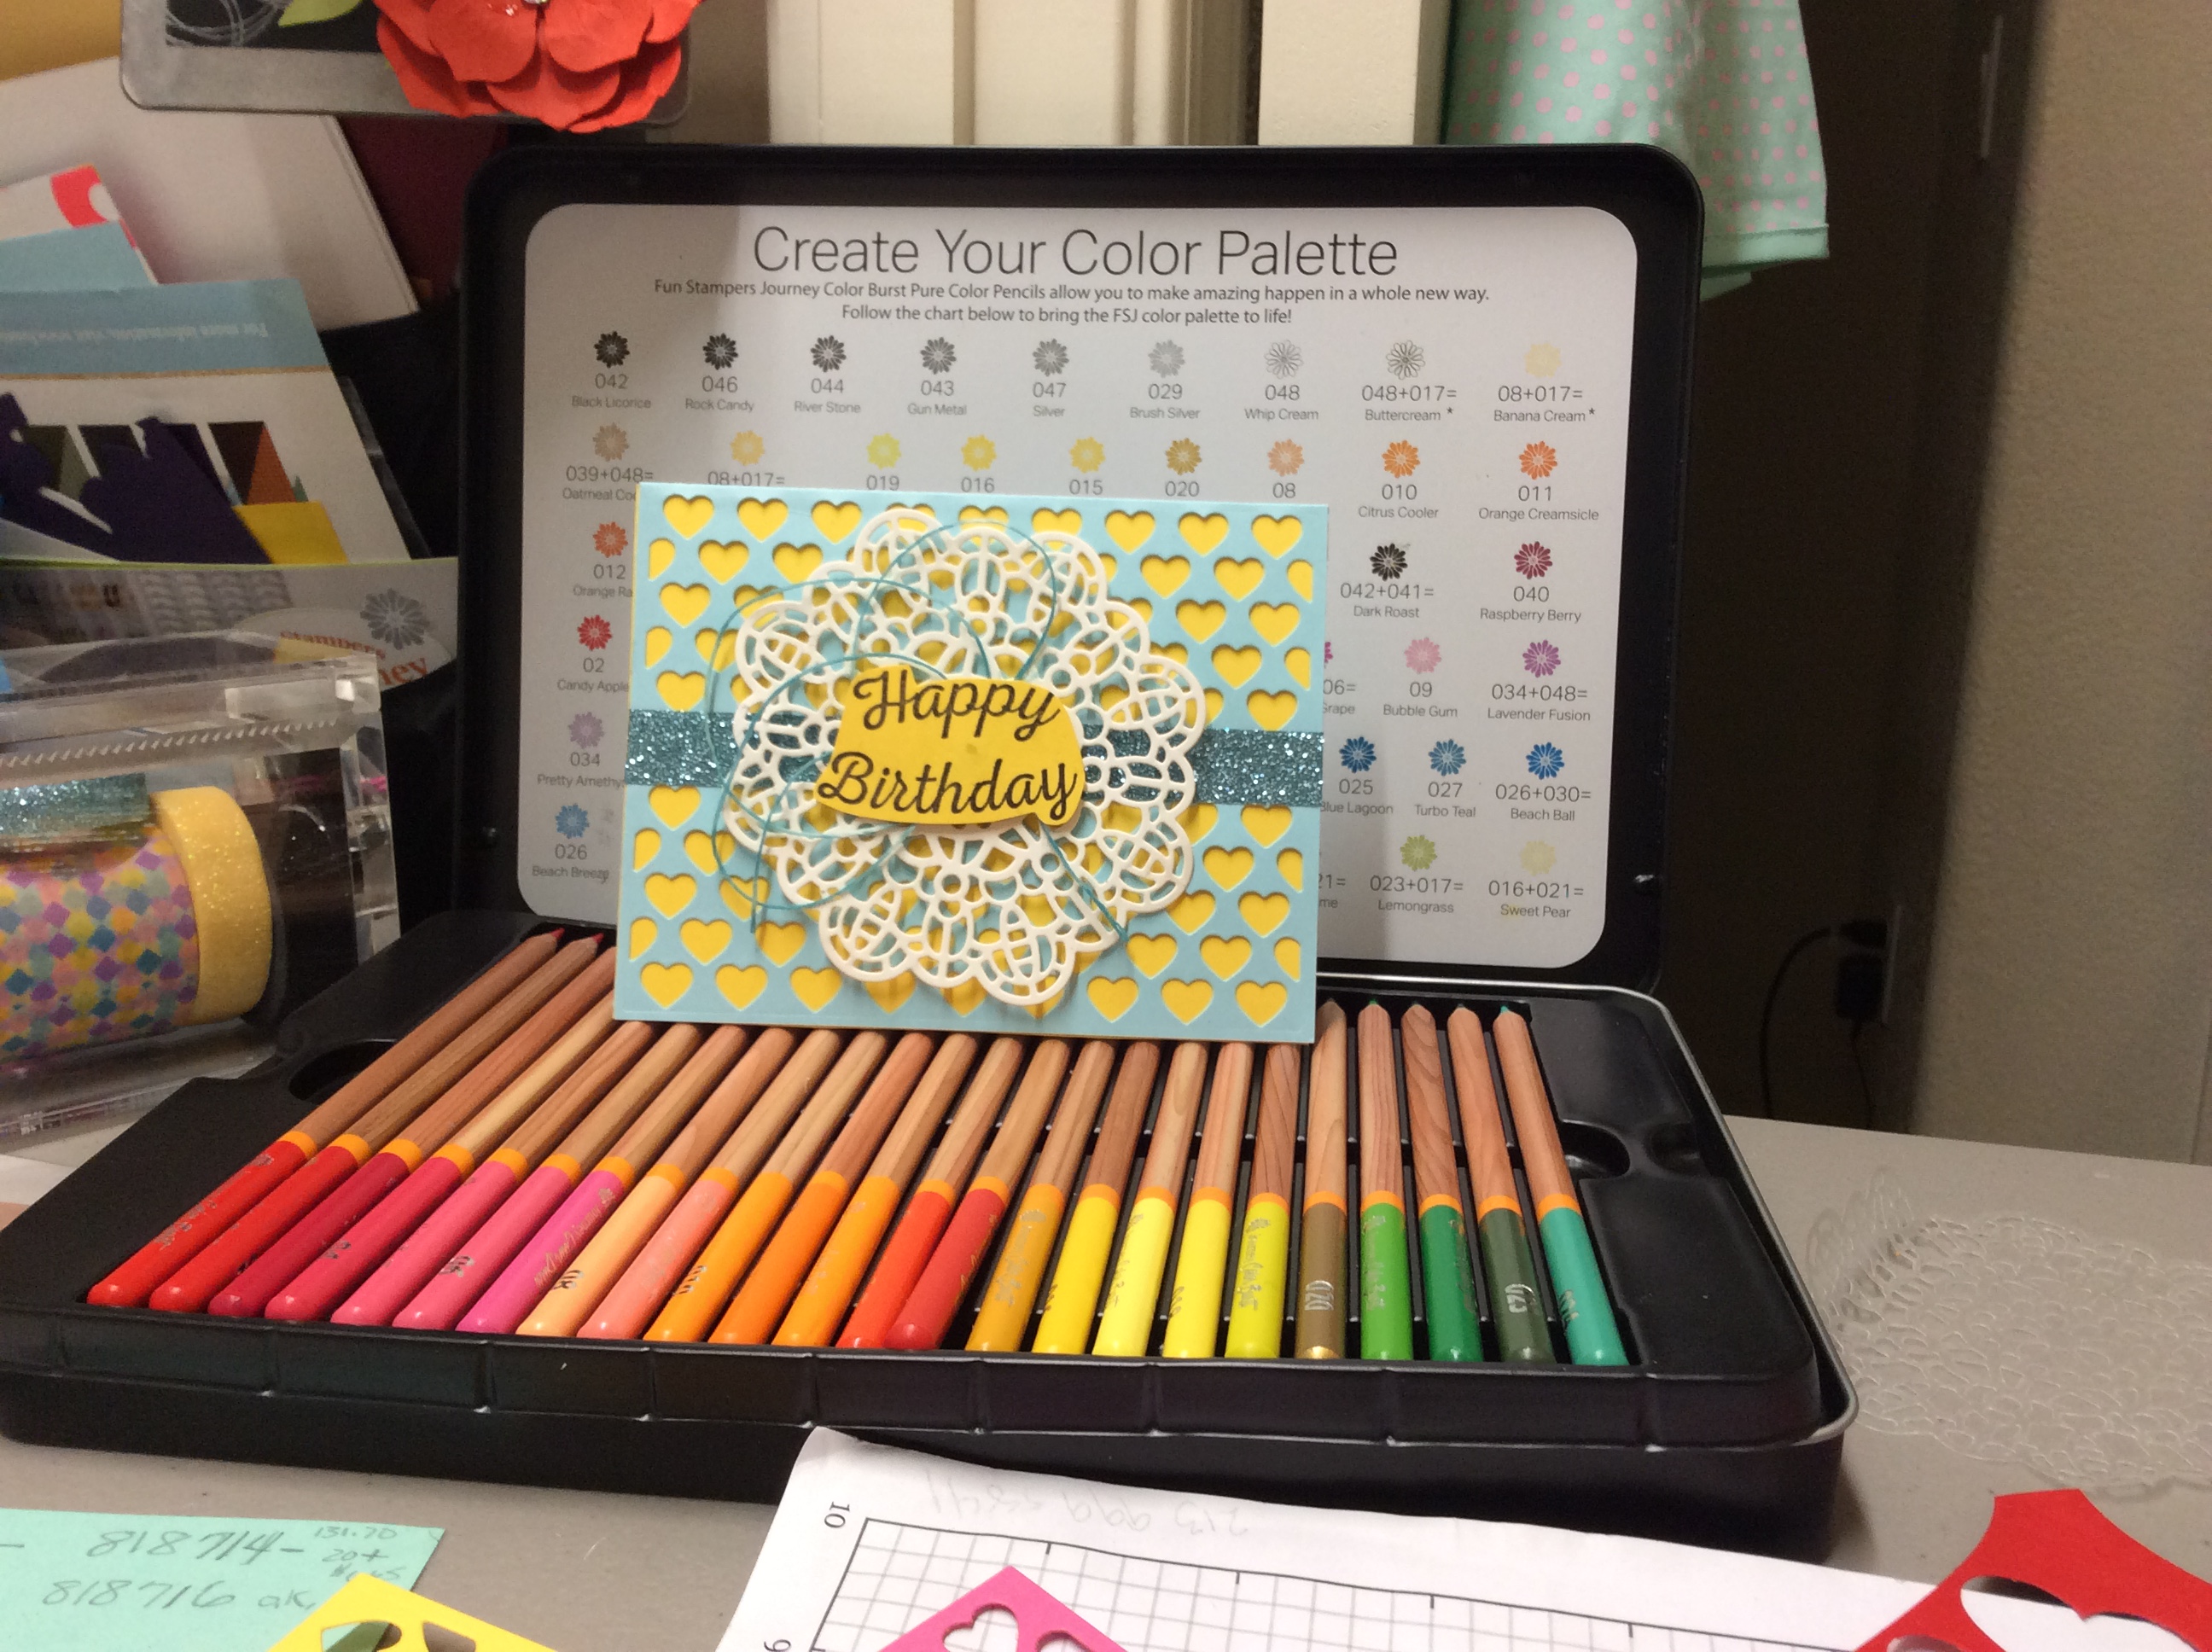 Created using these FunStampersJourney products:
Card Stock: Pool Play, Lemon Drop, Whip Cream
Ink: Black Licorice
Reinker: Pool Play
Pool Play Sparkle Tape, Whip Cream Journey Thread
Heart Strip Die Set DI- 0267 Doily Die DI-0105
Yummy Wishes Stamp Set SS-0155
Journey Foam Adhesive and Journey Craft Glue
Note: I customized the Journey Thread by coloring it with the Re-inker
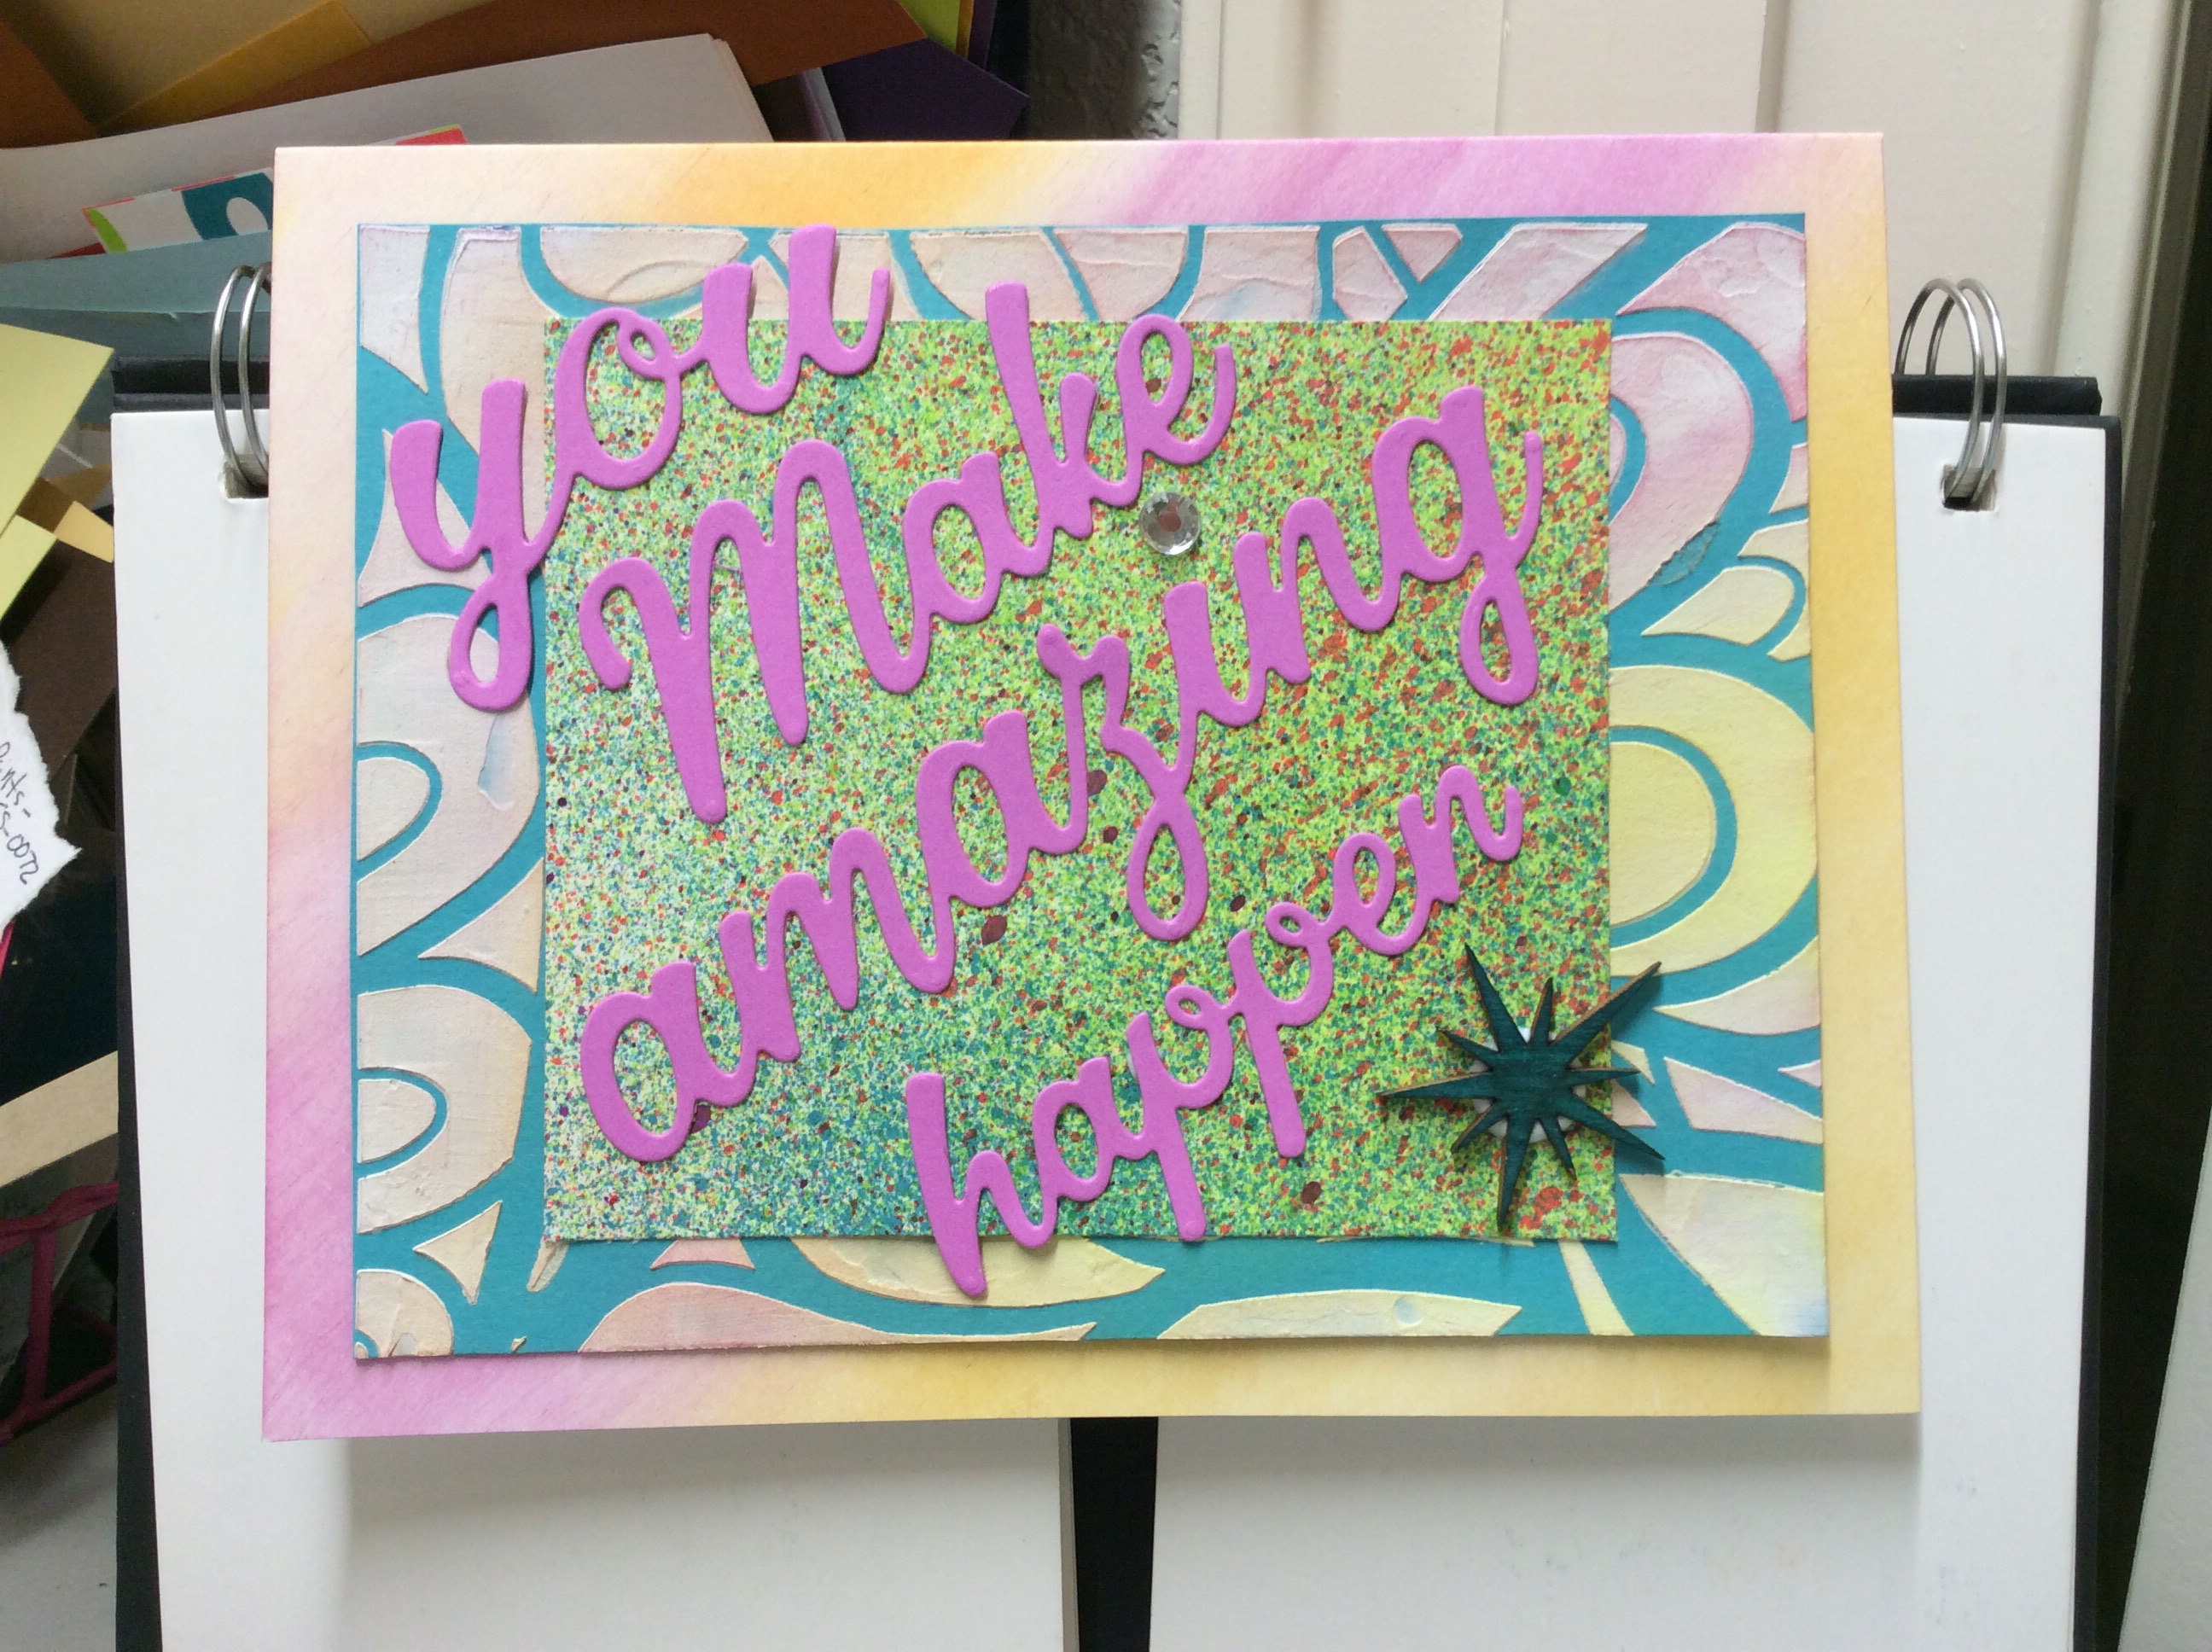 Using all FunStampersJourney product:
Card Base WhipCream card stock 6 1/4 inches by 10 folded in half and creased with crease tool. Washed with Pan Pastels: Pinapple Smoothie, Sweet Berry, Candy Apple, Summer Days and Citrus Cooler.
layer 1: Turbo Teal card stock stenciled with Artful Wall Stencil JM-0088 and Journey Modeling Paste. Let dry thoroughly, preferably over night.
Layer 2: WhipCream card stock sprayed with Journey Splashes: Turbo Teal, Cosmic Grape, Outrageous Pink, Sour Lemon, Electric Lime. Let this dry throughly.
words: Cosmic Grape card stock and dies that came with the Amaze Machine and The RG Amaze Machine.
Finished with Amazing Accents AC-0201 painted with Turbo Teal Silk
and Cut Rhinestones AC-0023.
I made my bow maker using a scrap piece of wood( I stole it from my husbands discard pile.) lol😇 Then I also borrowed( translation:to keep forever ) 2, 3inch long screws. I was working out of classification and drilled the holes with my husbands power drill,to fit the screws loosely, every inch apart, across the piece of wood. I adjust the screws depending on the size width of ribbon and the application( where it will be placed).


Now to tie a bow: use a piece of ribbon that is 1 inch wide by approximately 20 inches long. Hold the ribbon on the right screw and wrap it around the front of the left screw and back behind to come around the right screw. Bring that same end under the middle and back to the front using the end in right hand to tie it into bow. Remove from the screws and adjust it and cut the ends into a chevron . Taadaa! A pretty bow!
I hope this helps!
 Using all Fun Stampers Journey product. Use the picture for reference:
Before making card base, make your custom paper by spraying Whip Cream card stock randomly with color splashes. I used Sour Lemon, Cosmic Grape, Turbo Teal, Outrageous Pink, Orange Rave. Let dry thoroughly before using.
card base: 4 1/2″by 11″
Using Whip Cream card stock cut approximately 4″by 5″ then tear edges and distress with Citrus Cooler Ink and swish front of this piece with the ink pad too.
Stamp with Happy Sentiments Stamp Set SS-0304 with Citrus Cooler Ink.
Wrap with Journey Natural Thread and tie in a cute bow.
Adhere to card base with Journey Easy Glide Adhesive.
Stamp inside of card with appropriate Sentiments from either or both Stamp Sets Sentimental Prints SS-0072 and or Rock Notes SS-0211. With Black Licorace Ink.
Finish card front by placing Spring Dots according to picture.
Send to someone special to say Thank you!
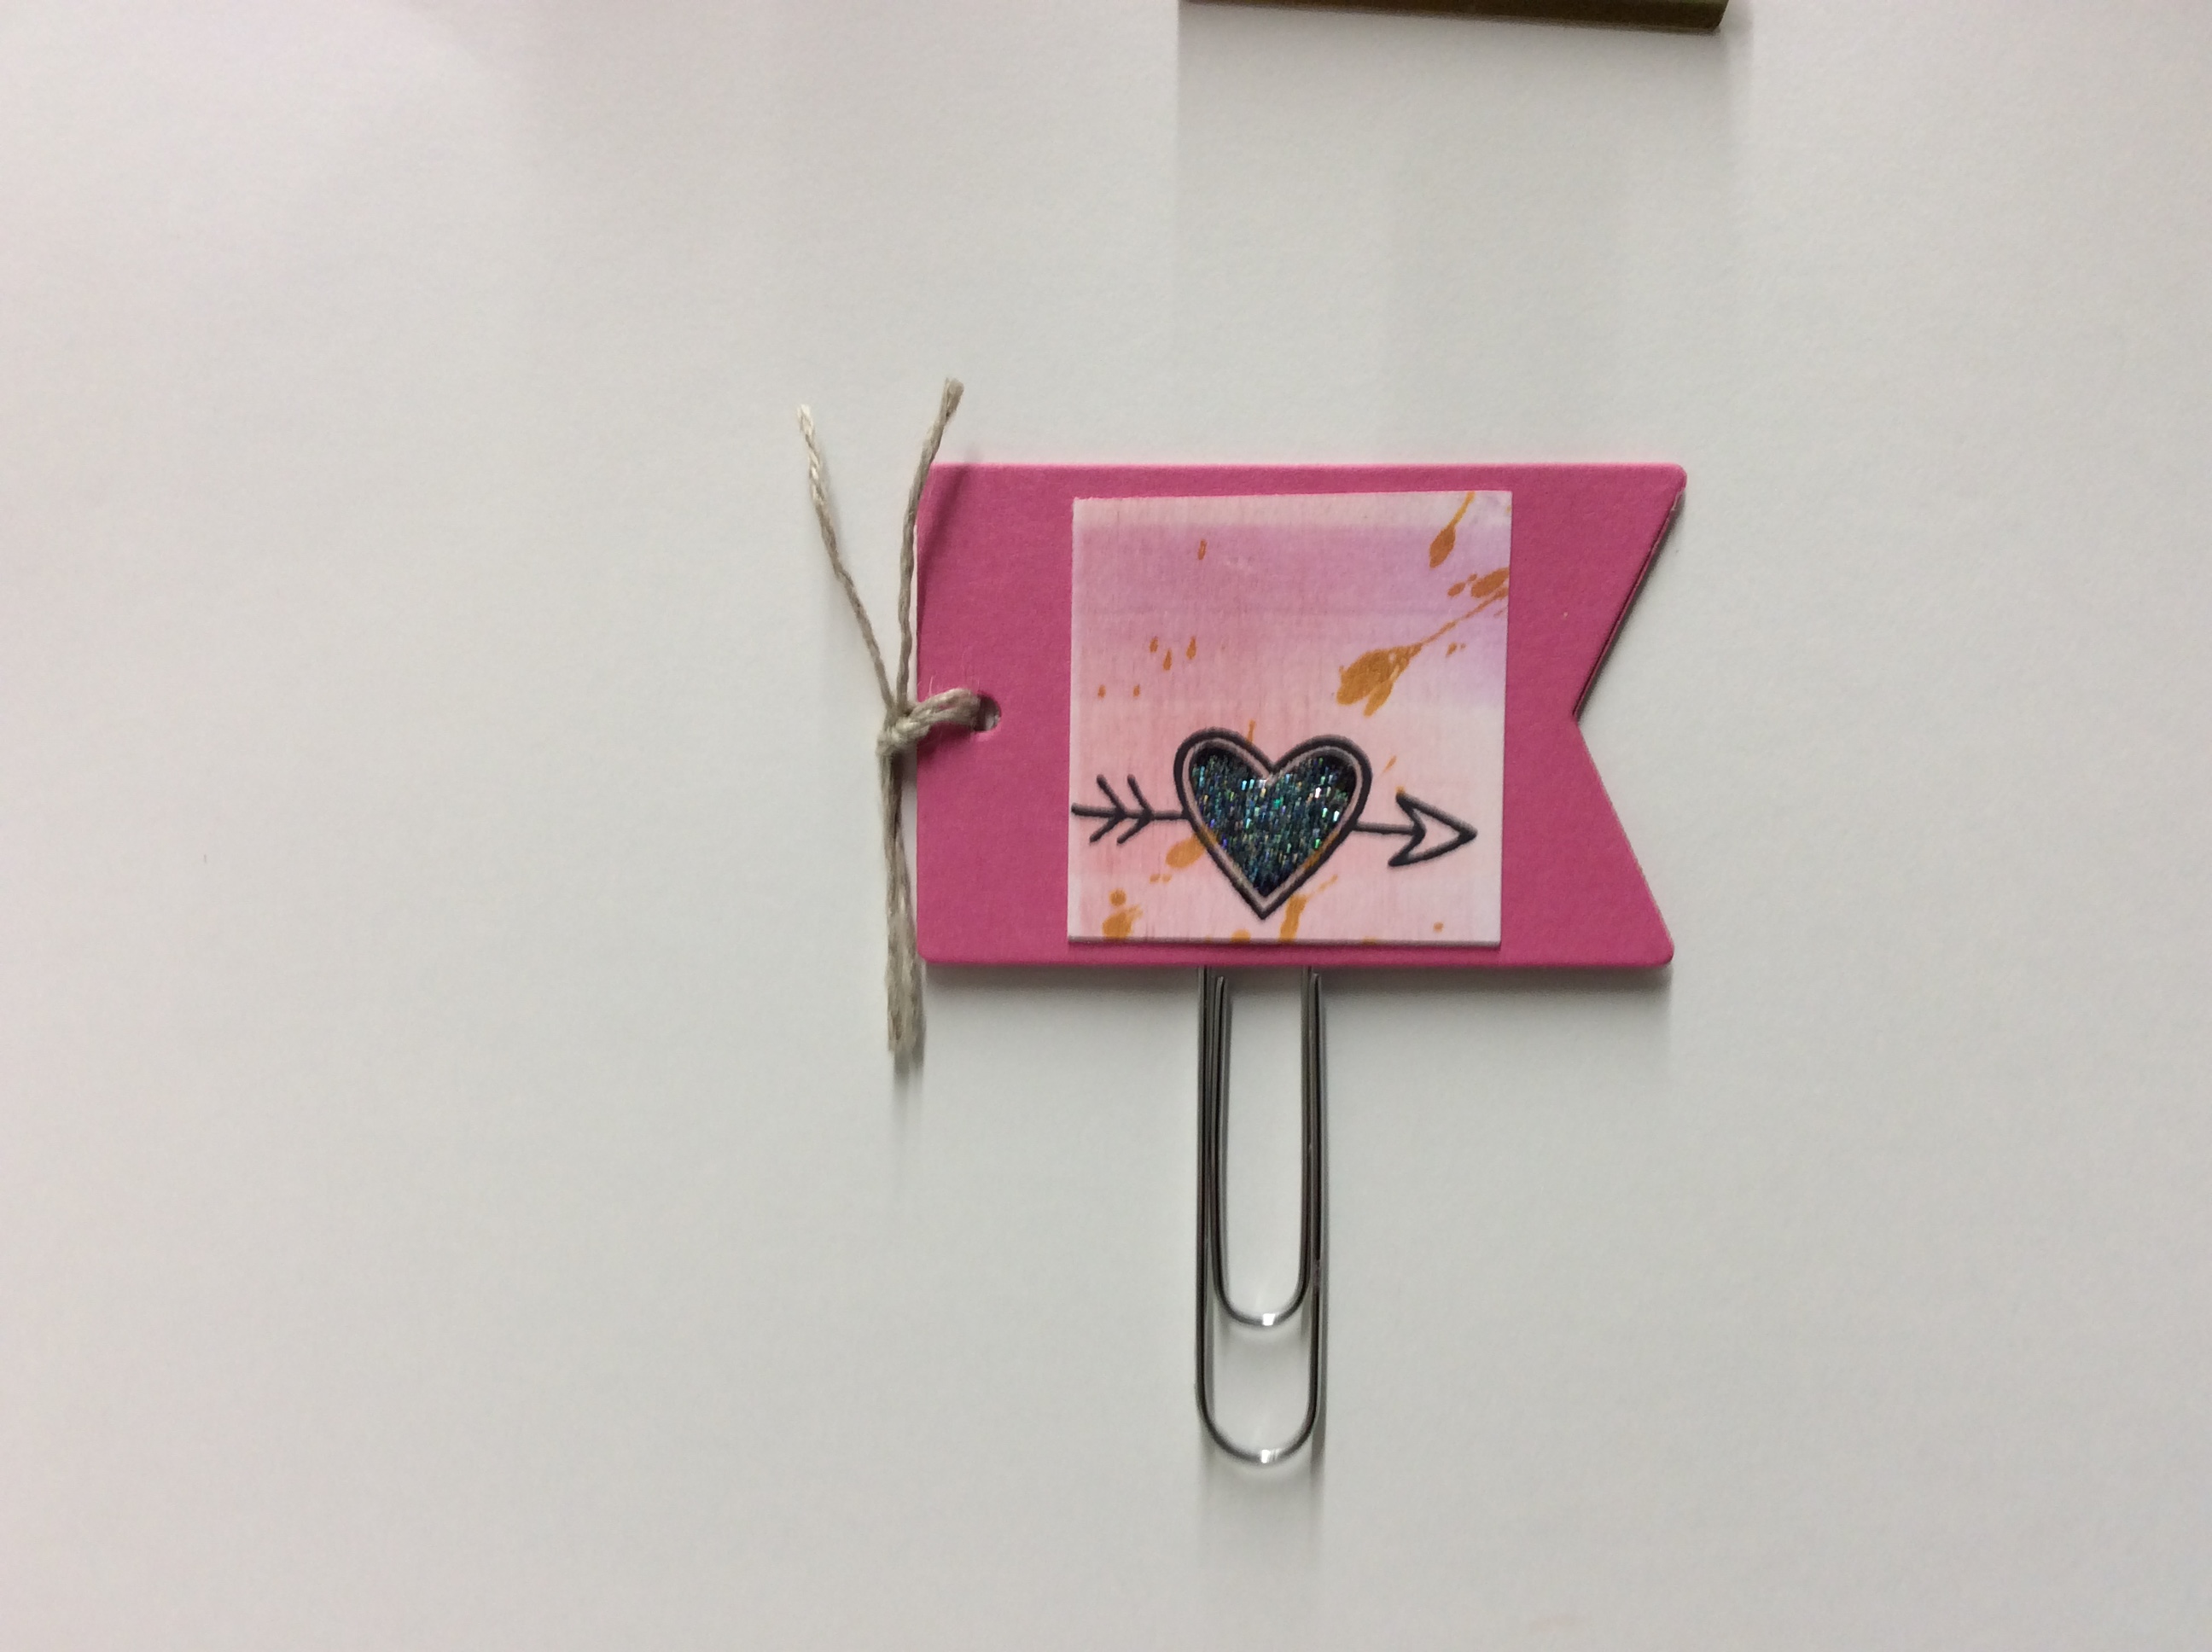 Using all FunStampersJourney product with the exception of theJumbo Paper Clips and the industrial strength glue( E6000 Clear ) . Be careful this glue is really industrial strength!
Using Watermelon Fusion card stock cut 2 pieces with the Everyday Tags DI-0255 . Using the E6000 glue, glue together just the top portion of Clip,with Jumbo Paperclip in the middle forming a sandwich. Let dry completely then assemble with a square piece of WhipCream card stock that has been washed with pan pastels in a plaid formation and sprinkled with Gold Silk. Cut into 1 1/4 inch square and stamp with Black Licorace Ink using the Stamp Set Planner Elements SS-0402. Using the picture as your guide. Decorate the inside of the heart with Journey Glaze and Journey Sparkle Dust. Let dry and finally using Natural Journey Thread tie a cute knot in the punched out circle.
 Recipe:
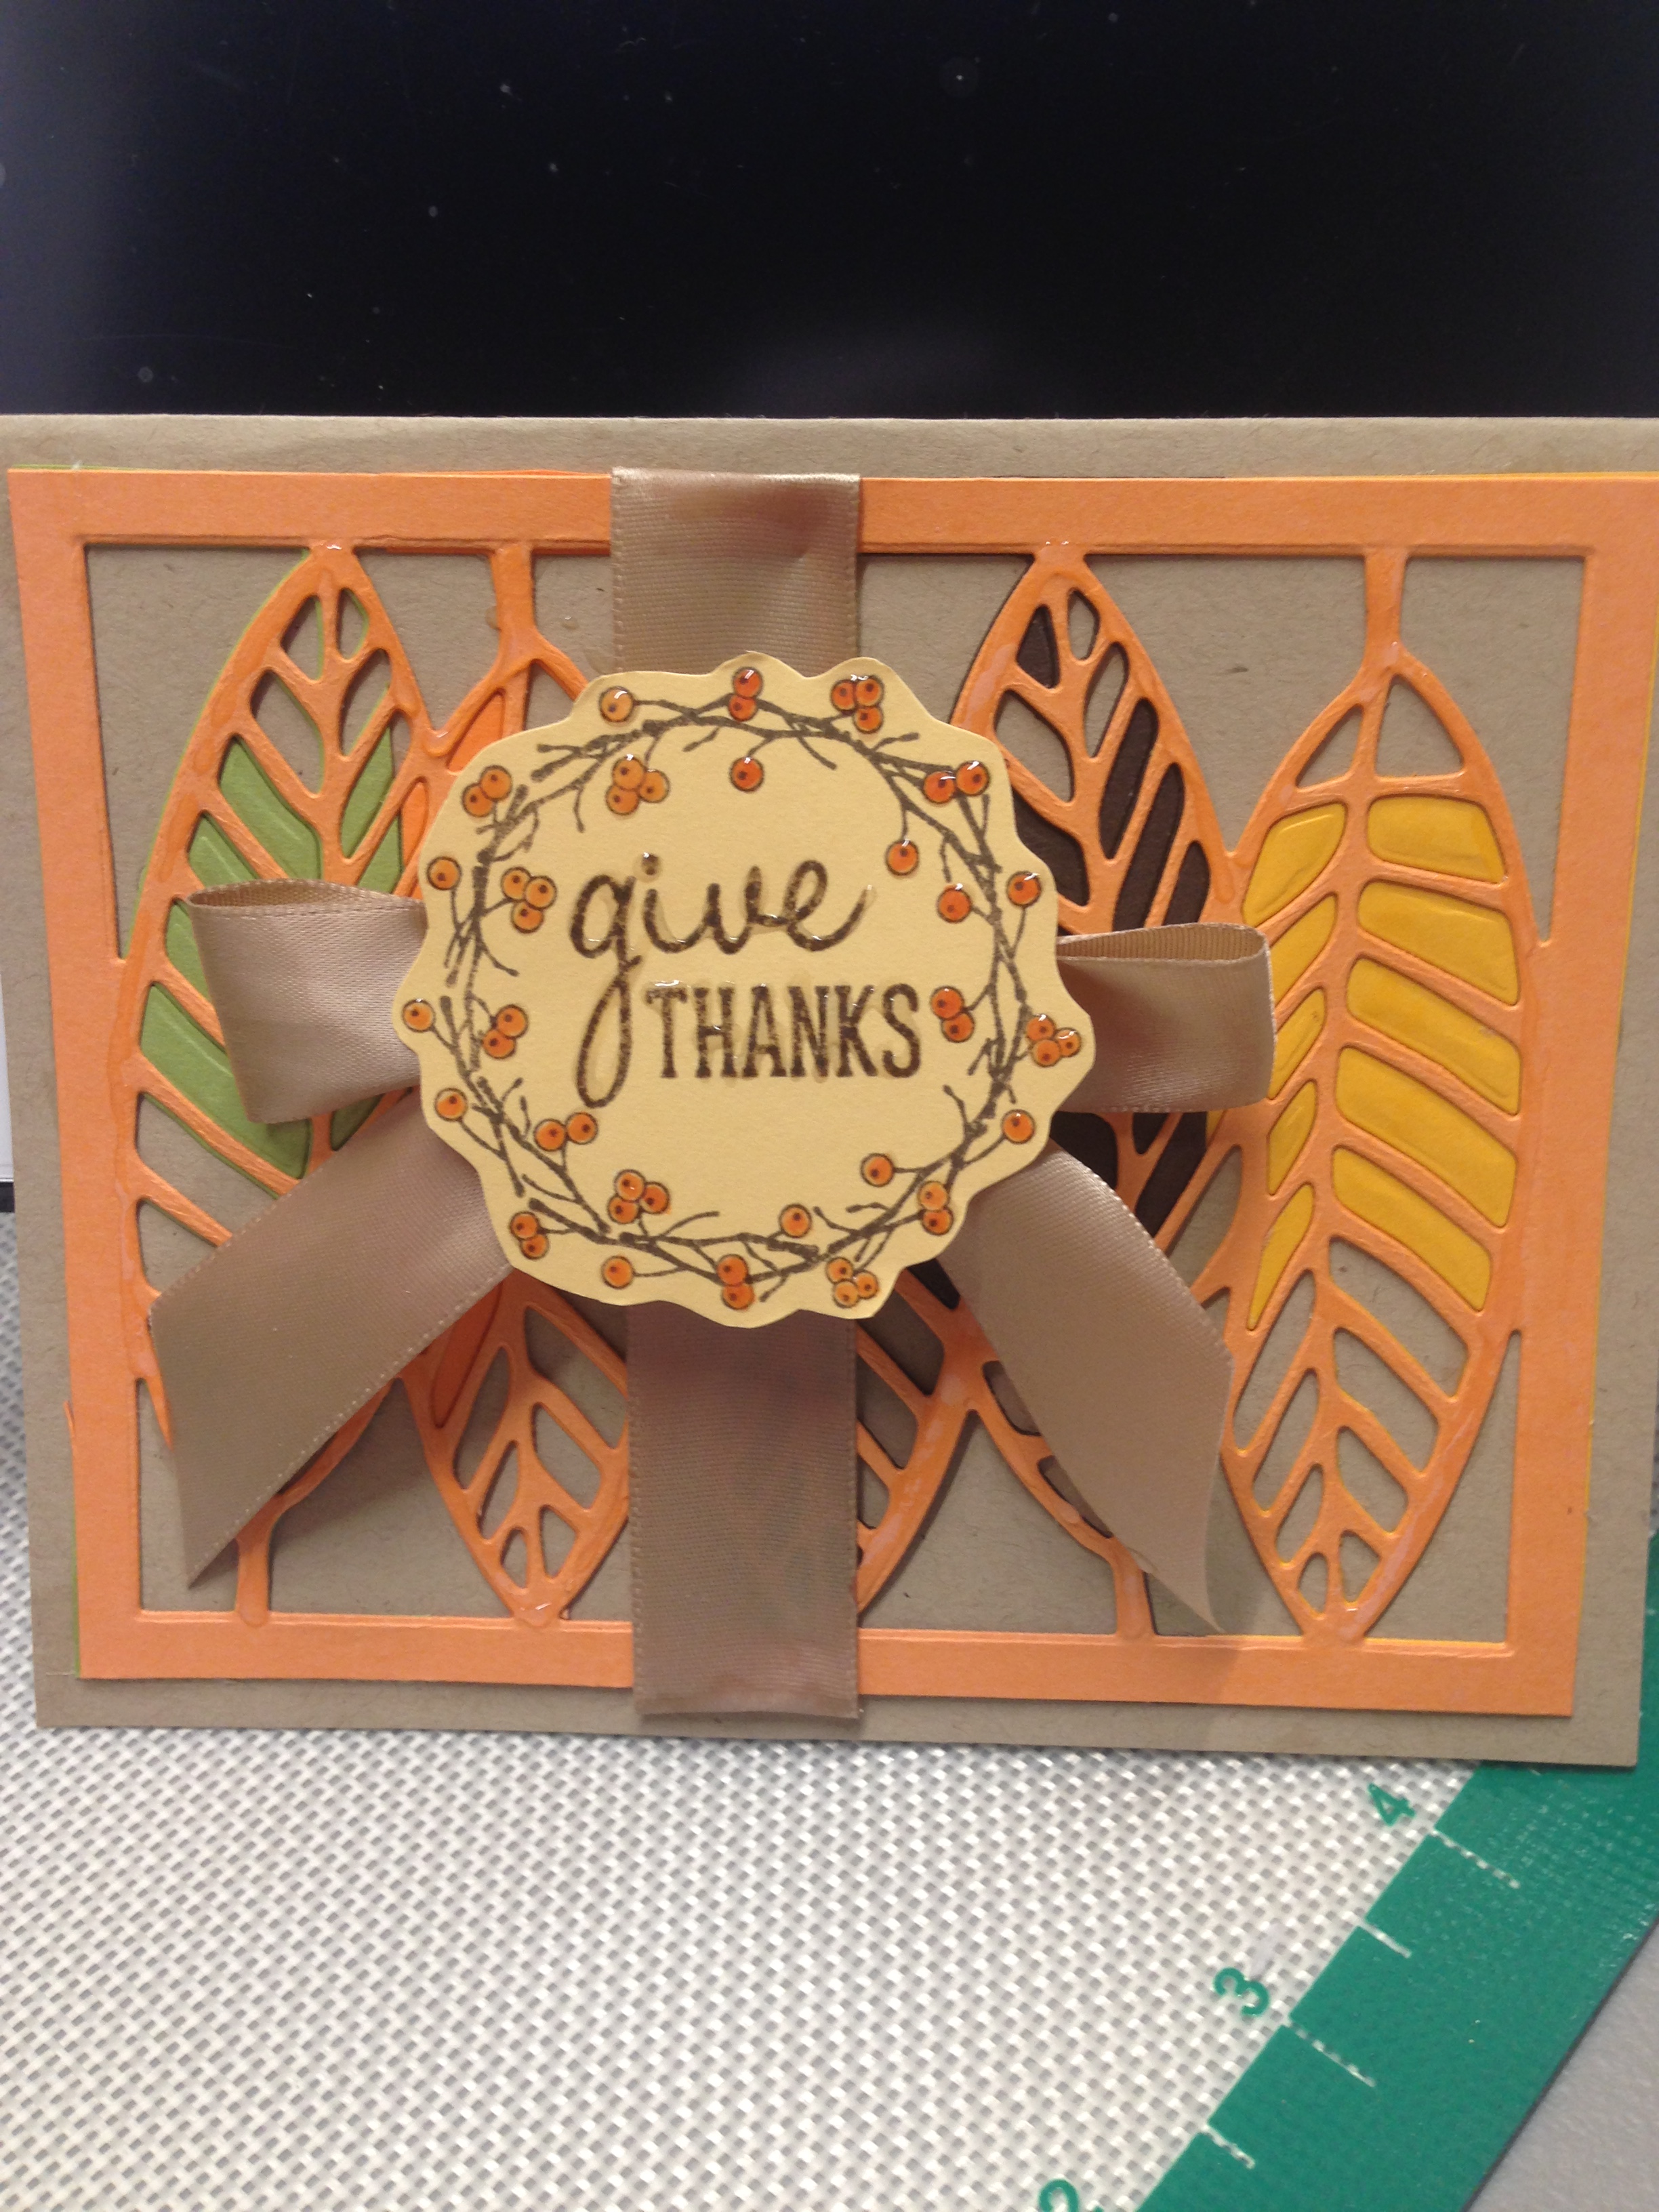
I used all FunStampersJourney product.
Card blank: 9 3/4″ by 6 3/8″ folded in half and creased with crease tool.
layer 1: take 2 1/2″ strips of Citrus Cooler, Pineapple Smoothie, Lemon Grass and Hazelnut blend Card Stock,place size by side and tape together, run through your die cutting machine ( I use my Amaze Machine ) with the Layered Leaves die DI-0215 and then remove some of the pieces in the middle but not all, then run another piece of Orange Creamcicle with same Layered leaves die, this time remove all interior pieces and adhear all together with Journey Craft Glue. Then using the picture place a piece of Oatmeal Satin Ribbon over all the die cut pieces and glue all layers to the Oatmeal Cookie card base. Make a bow with another piece of Oatmeal Satin Ribbon and adhear to card with medium Foam Squares. Stamp on a scrap piece of Pineapple Smoothie Cardstock AT-0159 Grateful Heart with Hazelnut Blend ink. Color on the stamped image with Pineapple Smoothie Reinker or coloring device of your choice. Fussy cut the whole image and Place over bow with Foam square and use Journey glaze to decorate the outside leaves and the berries and saying. Enjoy!
How to tell someone: “YOU ARE AWESOME!”
using all FunstamperJourney products
use picture for placement
Card Base: 5 1/2x 8 1/2 folded in half and creased with crease tool. Card Stock: Electric Lime
Layer 1: Turbo Teal Card Stock stenciled with Fun Stamper Modeling Paste with Artful Wall Stencil JM-0088 let dry completely. Lightly wipe with Pan Pastels: Light Gold, Bubblegum, Cool Pool,Pretty Amethyst. Cut into panel 5 1/4″x 4″. Adhear to card base with adhesive.
Layer 2: using Color Splashes Spray a sheet of Whip Cream Card Stock randomly using aTurbo Teal,Orange Rave,Outrageous Pink,Sour Lemon and Cosmic Grape. Let dry completely and then cut a panel 5″x 3 3/4″ and adhear to Layer 1 with tape Adhesive.
Wrap a piece of Citrus Cooler Satin Ribbon around the middle of both layers and adhear to the back.
Stamp sentiments from SS-0211 Rock Notes and SS-0269 Be Amazing on a scrap piece of Lemon Drop Card Stock with Black Licorace Ink and then cut into Arrows . Place down middle of the Ribbon with Foam Squares. One sentiment was created by using the mask technique.
Place a Cut Rhinestone to dot the I in Amazing. Outline all of the words lightly with Journey Glaze and Journey Sparkle Dust.
Send to someone for encouragement! Let them know they are Awesome!
classes available and plain old fun: www.funstampersjourney.com/SRogersArtDesignStarz19
 Weekly Challenge 10/3/2016
see photo for all placements
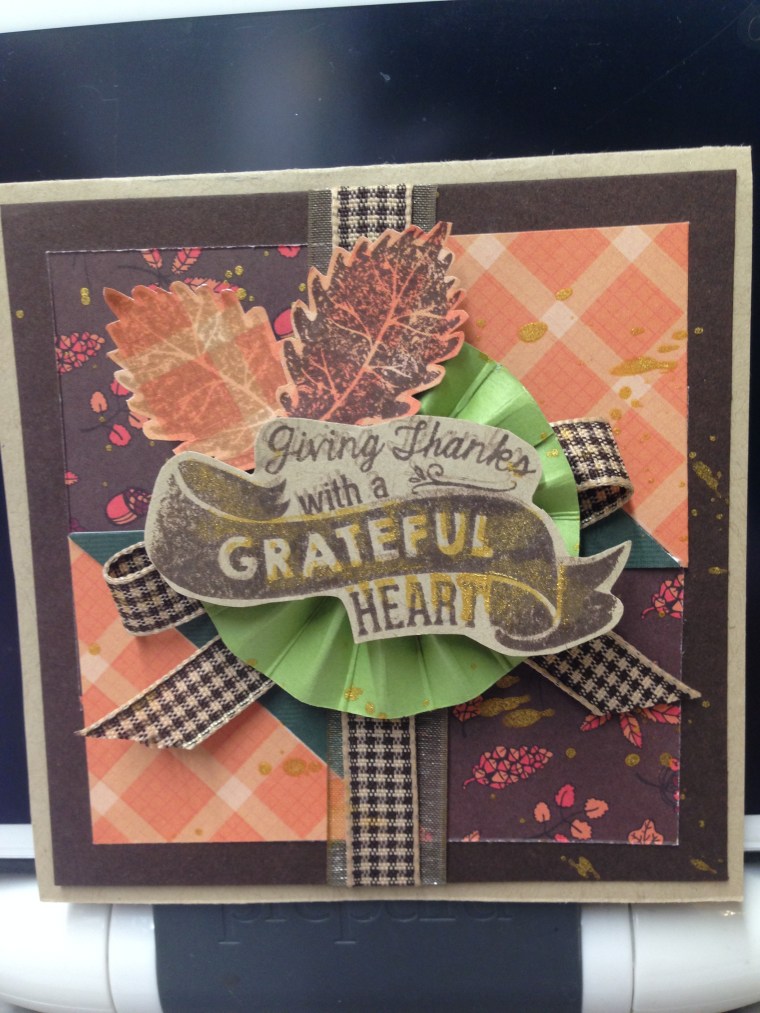
I created with all FunStampersJourney product.
4 1/4 X 8 1/2 card base out of Oatmeal Cookie Card Stock, folded in half and creased with bone folder.
Layer 1: Cocoa Powder Card Stock cut 4×4
Layer 2: 2×2 squares cut on Diagonal from Autumn Prints Patterned Paper, placed on Cocoa Powder layer with Easy Glide Adhesive.
Cut 2 pieces of Ribbon, 5 inches long of Gingham Cocoa Powder and Oatmeal Cookie Organza Ribbon. Adhear to layer 1 and 2 with adhesive or craft glue on back of the 2 layers.Use a piece of the Gingham Cocoa Powder ribbon to make a pretty bow. Glue to middle of card front.
Rosette was cut from Lemon Grass Card Stock. 1 inch x 8 inches and scored every 1/4 inch. Then fan folded and glued together to form a circle.Flatten into a Rosette and glue onto 2 small round scraps of Lemongrass Cardstock, one on the front and the other on the back and glue to center of Pretty bow with Journey Craft Glue.
Stamp leaves from SS-0041 Give Thanks on scrap of plaid paper with Oatmeal Cookie ink and Cocoa Powder ink. Fussy cut.
Stamp sentiment At-0159 Grateful Heart on Oatmeal Cookie with Cocoa Powder ink and then ink again on top with Gold Silk. Fussy cut and adhear to rosette with Medium Foam Squares. Place leaves under the sentiment with Small Foam Squares.
Gently splash entire card with Gold Silk.
Send to someone to brighten their holiday season.
For classes, questions and orders follow me at: coachstephroger.1@gmail.com
or http://www.funstampersjourney.com/stephanierogers
